Small garden design: 7 Best Setup Hacks for Tiny Spaces
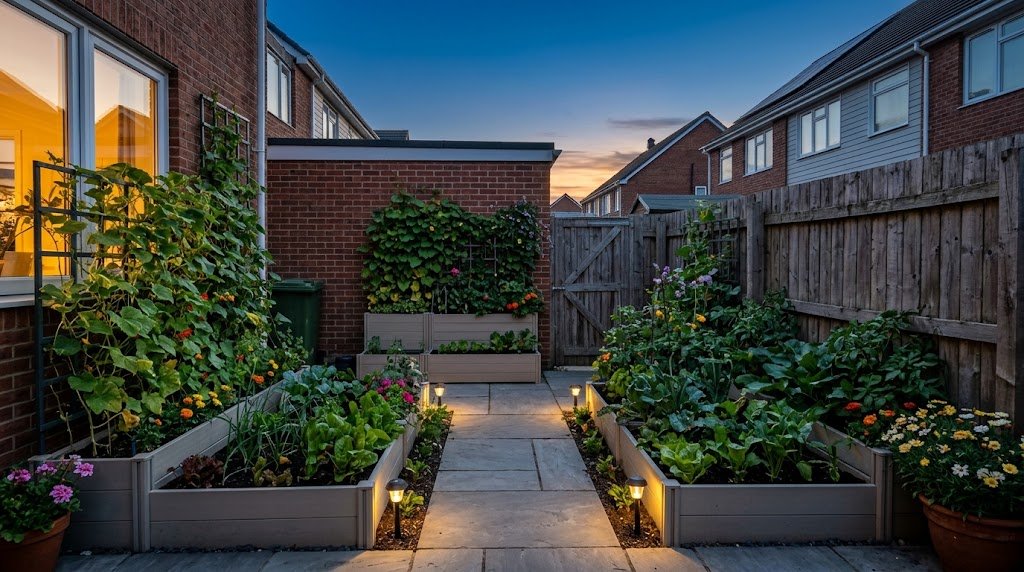
Did you know that utilizing smart vertical landscaping and automated micro-irrigation can increase your plant yield by up to 300% per square foot while reducing water waste by over 50%? Many urban dwellers and homeowners with limited outdoor spaces assume they cannot grow a meaningful amount of fresh produce or create a lush botanical retreat. However, achieving an incredible small garden design is not about having a massive sprawling lawn; it is about maximizing the spatial volume you do have through intelligent horticulture and modern garden tech. By integrating compact raised beds, vertical trellising, and Wi-Fi-enabled soil monitoring, you can transform a cramped balcony, concrete patio, or narrow side yard into an autonomous, high-yield oasis. In this comprehensive guide, we will explore the exact data-driven strategies and tech setups needed to master compact gardening.
Quick Answer:
The most effective small garden design relies on maximizing vertical space with tiered planters and maintaining perfect hydration through automated, smart micro-drip irrigation. By grouping plants with similar microclimate needs and using Wi-Fi soil sensors, you can create a self-sustaining, high-yield garden in even the tightest urban footprints.
Materials and Supplies List
Building a thriving ecosystem in a confined space requires premium, lightweight materials that support vigorous root growth without overloading balconies or creating drainage nightmares.
- Modular Raised Beds & Vertical Planters: Opt for lightweight Corten steel planter boxes, food-safe HDPE plastic tiered towers, or breathable fabric grow bags. If weight on a balcony is a concern, fabric pots provide excellent aeration and weigh a fraction of traditional terracotta.
- Premium Potting Mix: Do not use heavy garden topsoil in containers. You need a specialized, lightweight soil blend consisting of 1/3 coco coir (for moisture retention), 1/3 perlite or coarse vermiculite (for superior root aeration), and 1/3 rich organic compost or worm castings (for slow-release nutrients).
- Micro-Drip Irrigation Kit: 1/4-inch flexible polyethylene tubing, micro-emitters (0.5 GPH), T-connectors, and a pressure regulator designed specifically for small container setups.
- Organic Fertilizers: Because small containers deplete nutrients quickly, stock up on liquid organic fertilizers like kelp extract and fish emulsion for fast-acting, easily absorbed nutrient boosts.
- Eco-Friendly Substitutions: Upcycle heat-stamped (HT) wooden shipping pallets to create beautiful, rustic vertical living walls. Instead of buying expensive synthetic plant food, install a compact Bokashi composting bin under your kitchen sink to generate potent, organic fertilizer tea from your daily food scraps.
Tools and Equipment Required
To seamlessly integrate plant biology with automated tech in a tiny space, you will need a few specialized tools for installation and ongoing monitoring.
- Smart Technology Hubs: A Bluetooth or Wi-Fi-enabled smart hose timer (such as the Eve Aqua or Orbit B-hyve) to automate your watering schedules based on hyper-local weather data and evaporation rates.
- Soil Monitoring Equipment: Wireless soil moisture and ambient light sensors that push real-time environmental alerts directly to a dashboard on your smartphone, preventing accidental overwatering in containers without drainage holes.
- Installation & Layout Tools: A cordless drill with masonry bits (if attaching trellises to brick walls), a heavy-duty tape measure, and a magnetic torpedo level.
- Compact Horticultural Tools: A precision carbon steel Hori-Hori knife, micro-tip bypass pruning snips for delicate herb harvesting, and a narrow hand trowel designed for small pots.
- Tech Cable Management: UV-resistant exterior zip ties, weatherproof silicone wire connectors, and adhesive cable clips to safely route and hide irrigation tubing and sensor wires along baseboards or railings.
Project Time & Growth Timeline
Implementing a high-tech compact layout is highly efficient. Because you are not tilling large tracts of earth, the physical labor is drastically reduced, allowing you to focus on the digital automation.
- Active Setup Time: 1 weekend. Assembling vertical planters, mixing lightweight soil, and arranging your containers will take a Saturday. Running the micro-drip tubing, syncing your smart hub to your home network, and planting your seedlings will take Sunday.
- Ongoing Maintenance Time: Integrating a smart watering monitor reduces manual hydration checks by up to 80%. Expect to spend just 10 to 15 minutes a week doing light pruning, harvesting herbs, and checking your smartphone app for low-battery alerts on your sensors.
- Expected Growth Timeline: Fast-growing microgreens and loose-leaf lettuce can be harvested in just 21 to 30 days. Determinate patio tomatoes and dwarf peppers will fruit within 60 to 80 days, while perennial climbing vines will take a full season to cover a privacy trellis.
Step-by-Step Guide
Step 1: Map Your Microclimates and Sunlight
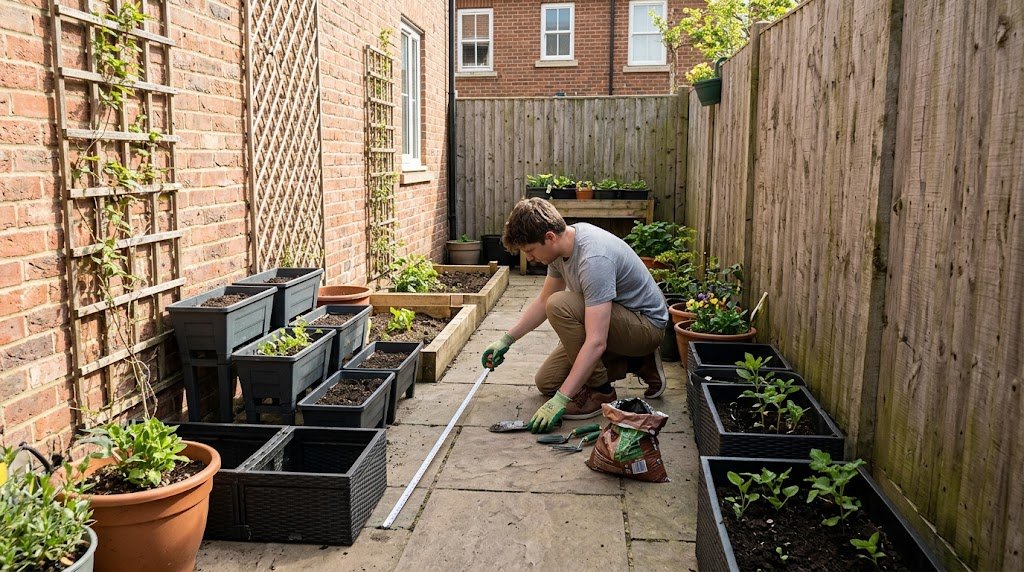
In a tight urban space, nearby buildings and balcony overhangs cast harsh, shifting shadows. Spend a day mapping your sunlight. Determine which corners receive 6+ hours of direct sun (ideal for fruiting vegetables and solar-powered sensors) and which remain shaded (perfect for ferns and leafy greens). Sketch this layout on paper to avoid placing sun-loving plants in the dark.
Step 2: Maximize Vertical Real Estate
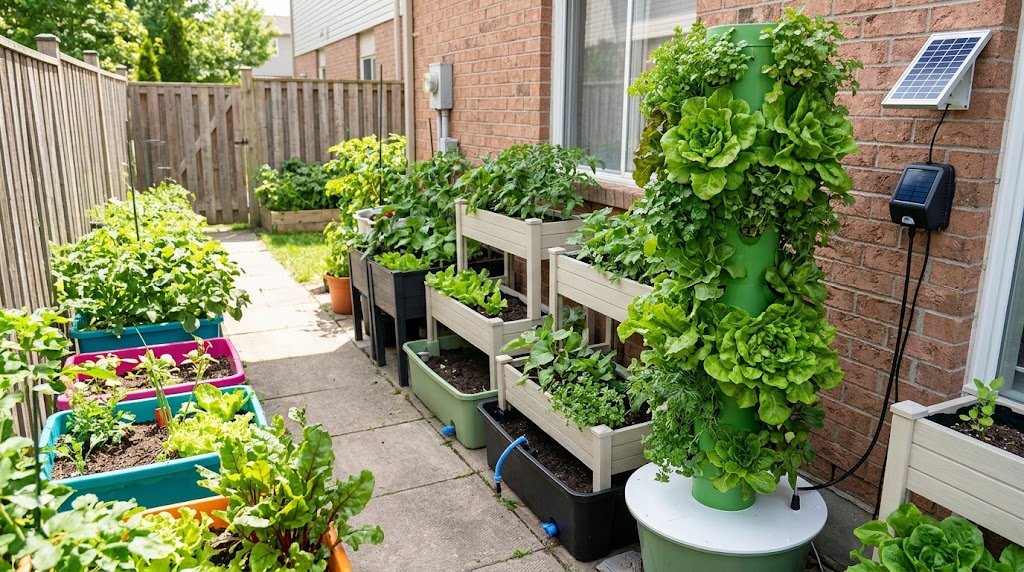
When you cannot grow outward, you must grow upward. Install secure vertical trellises, hanging baskets, or leaning ladder planters against your walls. If drilling into masonry, use appropriate wall anchors to ensure the weight of wet soil and mature plants does not pull the structure down.
Step 3: Mix and Prep Your Container Soil
Fill your planters with the lightweight coco coir and perlite mixture. For deep containers, you can add a layer of pine bark at the bottom to improve drainage and reduce overall weight. Ensure every single container has adequate drainage holes at the base; standing water in small spaces guarantees fatal root rot.
Step 4: Install the Smart Micro-Drip System
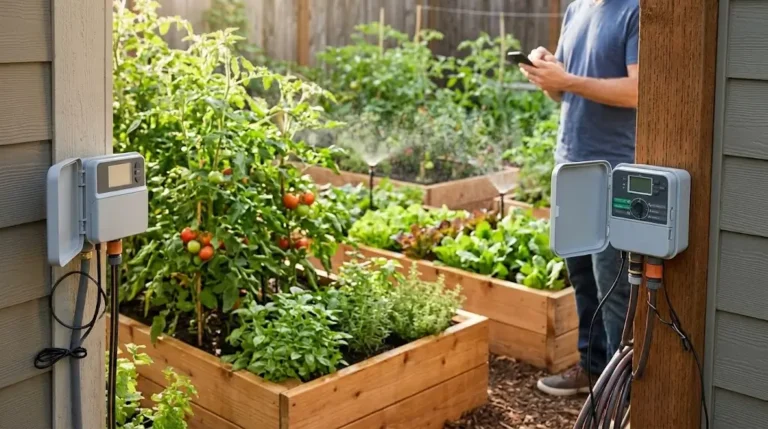
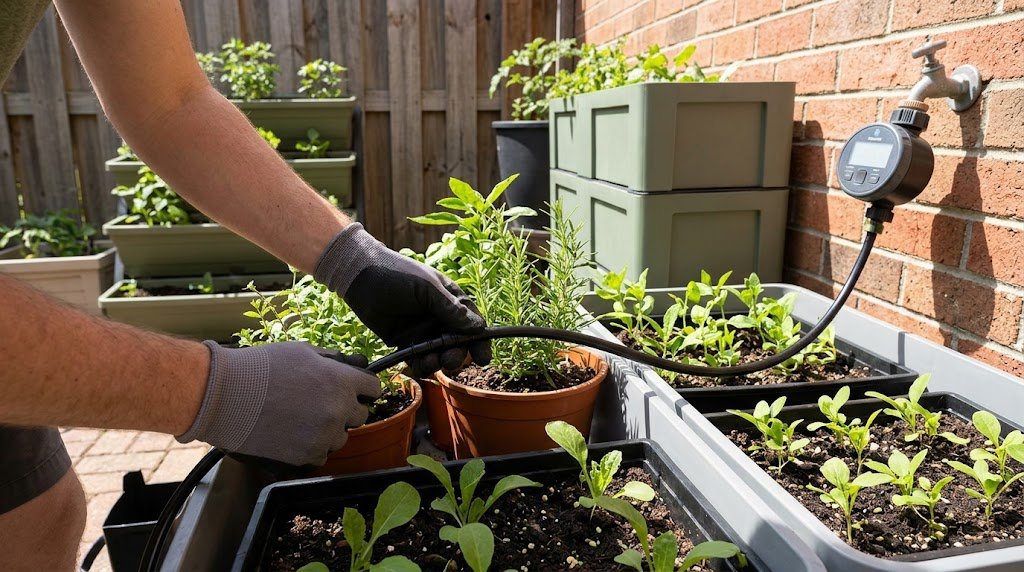
Connect your Wi-Fi smart timer to your outdoor water source (or a gravity-fed indoor reservoir tank if you do not have an outdoor spigot). Run the 1/4-inch micro-tubing along the back edges of your planters. Place one 0.5 GPH micro-emitter at the base of every plant. This delivers water precisely to the root zone, preventing runoff and keeping the foliage completely dry to stop fungal diseases.
Step 5: Deploy Sensors and Execute Planting
Sync your wireless soil moisture sensors to your 2.4GHz home Wi-Fi network. Plant your crops, gently burying the metallic sensor prongs directly into the root zone of your most sensitive plants. Program your smart hub app to trigger the irrigation only when the soil moisture dips below 30%, ensuring perfect hydration without the guesswork.
Plant Requirements & Technical Specs
To ensure your high-tech compact landscape thrives, you must align the biological needs of your plants with the technical limits of your hardware:
- Sunlight Needs: “Full Sun” crops require 6 to 8 hours of direct light. If your balcony faces North and lacks light, you can supplement it with outdoor-rated, automated LED grow lights synced to a smart plug timer.
- Watering and Drainage Requirements: Container plants dry out exponentially faster than in-ground plants. During peak summer, your smart drip system may need to run for 5 minutes twice a day. Ensure water drains freely out of the bottom of the pots to prevent anaerobic soil conditions.
- Soil pH: Use a digital pH meter. Most container vegetables thrive at a slightly acidic pH of 6.0 to 6.5. Because frequent watering washes nutrients and buffers out of potting soil, you must monitor pH monthly.
- Device Connectivity: Your smart garden timer and sensors must have a strong Wi-Fi signal. Exterior glass doors and brick walls heavily degrade 5GHz signals. Force your sensors onto the 2.4GHz band, and if necessary, plug a Wi-Fi range extender into the wall outlet closest to your patio door.
Alternative Methods & Eco-Friendly Options
If standard containers do not fit your aesthetic or you lack an outdoor water spigot, there are highly sustainable, space-saving alternatives:
- Hydroponic Smart Towers: For indoor apartments or extremely tight balconies, aeroponic or hydroponic tower gardens are incredible. These vertically stackable systems pump water and liquid nutrients over bare roots, growing 20+ plants in a single square foot of space with zero soil and 90% less water.
- Self-Watering Sub-Irrigated Planters (SIPs): If you do not have a spigot for a drip system, SIPs feature a hidden water reservoir at the base of the pot. The soil wicks moisture upward via capillary action exactly as the plant needs it, allowing you to refill the reservoir manually just once a week.
- Solar-Powered Drip Pumps: If you want an off-grid solution, connect a small solar-powered water pump to a 10-gallon bucket of harvested rainwater. It will automatically pump water through your micro-drip lines whenever the sun hits the panel.
Placement and Companion Planting Suggestions
Strategic placement in a confined layout creates a symbiotic ecosystem that naturally repels pests and encourages mutual growth.
- Container Companion Planting: Maximize every pot by combining plants that benefit each other. Plant a tall, indeterminate cherry tomato in the center of a large pot, surround its base with trailing nasturtiums (which act as a living mulch and decoy for aphids), and add a border of pungent basil to improve the tomato’s flavor and repel flies.
- Microclimate Positioning: Place heat-loving peppers and eggplants against a brick wall, which will absorb thermal energy during the day and radiate it back to the plants at night. Place delicate lettuces behind taller plants to shield them from the scorching afternoon sun.
- Sensor Placement: Always place your soil moisture sensor in a container holding an “indicator plant”—a plant that represents the average water needs of your garden (like a tomato). Do not place the main sensor in a drought-tolerant rosemary pot, or the rest of your garden will underwater.
Common Mistakes to Avoid
Even the most beautiful layouts can fail if foundational rules of container horticulture are ignored. Avoid these frequent small-space errors:
- Using Traditional Garden Soil in Pots: Bagged topsoil or dirt dug from the ground is incredibly dense. When placed in a container, it compacts into concrete, completely suffocating the root system. Always use a fluffy, soil-less potting mix formulated for containers.
- Ignoring Mature Plant Size: A common error is buying a “cute” indeterminate tomato seedling for a 2-gallon pot. Within two months, it will become root-bound, stressed, and incapable of absorbing water. Always research the mature root volume required for your chosen crops (e.g., tomatoes need at least a 10-gallon container).
- Setting and Forgetting Smart Tech: Smart irrigation timers are brilliant, but micro-emitters can occasionally clog with calcium from hard water. If a line clogs, the app will say it watered, but the plant will die. Always physically inspect your drip emitters once a month to ensure steady flow.
Maintenance and Long-Term Care Tips
To protect your botanical investments and keep your high-tech horticulture hub functioning seamlessly, implement this quick routine:
- Sensor Calibration and Cleaning: Every three months, gently pull up your soil moisture sensors and wipe down the metal prongs with fine steel wool and rubbing alcohol. Mineral scale buildup from hard municipal water will cause the sensors to send inaccurate, overly dry readings to your smartphone.
- Flushing Container Salts: Because containers are closed systems, synthetic fertilizers can leave behind a crust of toxic salt buildup. Once a season, thoroughly flush your pots with heavy amounts of pure water until it runs completely clear out of the bottom drainage holes.
- Winterizing Smart Irrigation: Before the first hard freeze of winter, you must disconnect your smart hose timers and bring them indoors. Water freezing inside the plastic valves will crack the manifold and destroy the internal circuitry. Unplug the micro-tubing to allow residual water to drain out so the plastic does not split in the cold.
Conclusion
Transforming your limited outdoor footprint into a lush, highly productive sanctuary is entirely possible when you combine strategic spatial planning with intelligent automated technology. By focusing on vertical growth, utilizing lightweight soil mixes, and integrating smart drip irrigation, your tiny space can yield massive results.
Ready to maximize your patio or balcony? Start sketching your vertical layout today, share your space-saving garden photos in the comments below, and subscribe for more Smart Gardening & Tech updates!
FAQs
Can I run a smart micro-drip system if I only have an indoor sink faucet? Yes. You can purchase specialized brass faucet adapters that easily thread onto most standard indoor kitchen or bathroom sinks. From there, you can attach a Bluetooth hose timer and run a discreet 1/4-inch irrigation line out your window or under your patio door to feed your balcony plants.
How do I stop mosquitoes from breeding in my balcony garden? Mosquitoes require stagnant, standing water to lay their eggs. Ensure that the drip trays underneath your plant pots are emptied regularly and do not hold sitting water for more than 24 hours. If you use a rainwater collection bucket for your solar pump, drop in a natural BTI “mosquito dunk” which targets larvae without harming plants, pets, or pollinators.
What are the best low-maintenance plants for a shaded apartment balcony? If your small garden design receives less than 4 hours of direct sunlight, avoid fruiting crops like tomatoes or peppers. Instead, focus on shade-tolerant, high-yield plants like spinach, Swiss chard, arugula, mint, and culinary ferns. These thrive in cooler, shaded microclimates and require significantly less water.