Raised Garden Bed 7 Best Easy Setup Tips
Did you know that utilizing a raised garden bed can increase your vegetable yield by up to 30% compared to traditional ground-level row planting? For many aspiring horticulturists and tech-savvy gardeners, poor native soil, aggressive weeds, and unpredictable drainage can make outdoor growing incredibly frustrating. Building a raised garden bed eliminates these variables, allowing you to create a perfectly controlled micro-environment for your plants. In this comprehensive guide, we will explore exactly how to plan, build, and optimize your elevated growing space using modern techniques and smart gardening technology to ensure your next harvest is your most abundant one yet.
Quick Answer:
A raised garden bed is a freestanding box placed above ground level and filled with nutrient-rich soil to improve drainage, prevent weed growth, and increase crop yields. You can easily build one using untreated cedar wood, line the bottom with cardboard to block weeds, and fill it with a mix of topsoil and organic compost for immediate planting.
Materials and Supplies List
Creating a thriving elevated garden requires the right foundational materials. Investing in high-quality supplies upfront will save you money and prevent structural rot over the years. Here is exactly what you need:
- Building Material: Untreated Cedar or Redwood boards (highly resistant to rot and insects). If you are looking for an eco-friendly substitution, consider recycled composite lumber or modular galvanized steel panels.
- Hardware: Exterior-grade, rust-proof deck screws (2.5 to 3 inches long).
- Corner Supports: Wooden stakes (e.g., 4×4 posts) or aluminum corner brackets for structural integrity.
- Base Layer/Weed Barrier: Unprinted, unwaxed brown cardboard or heavy-duty landscape fabric to smother underlying grass and weeds.
- Soil Blend: A premium raised bed mix consisting of 50% topsoil, 30% organic compost, and 20% aeration materials like perlite or vermiculite.
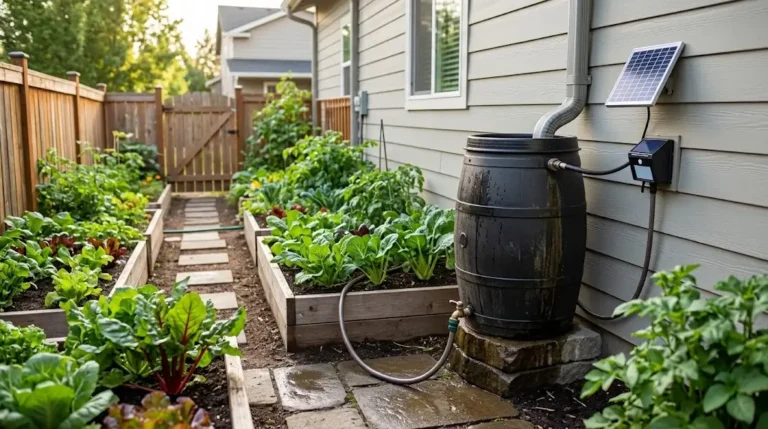
- Tech Components (Optional but recommended): A smart soil moisture sensor and an automated Wi-Fi drip irrigation kit to monitor your garden’s exact water needs.
Tools and Equipment Required
You do not need an entire workshop to put together a sturdy planter box. The required tools are standard and easy to use for beginners:
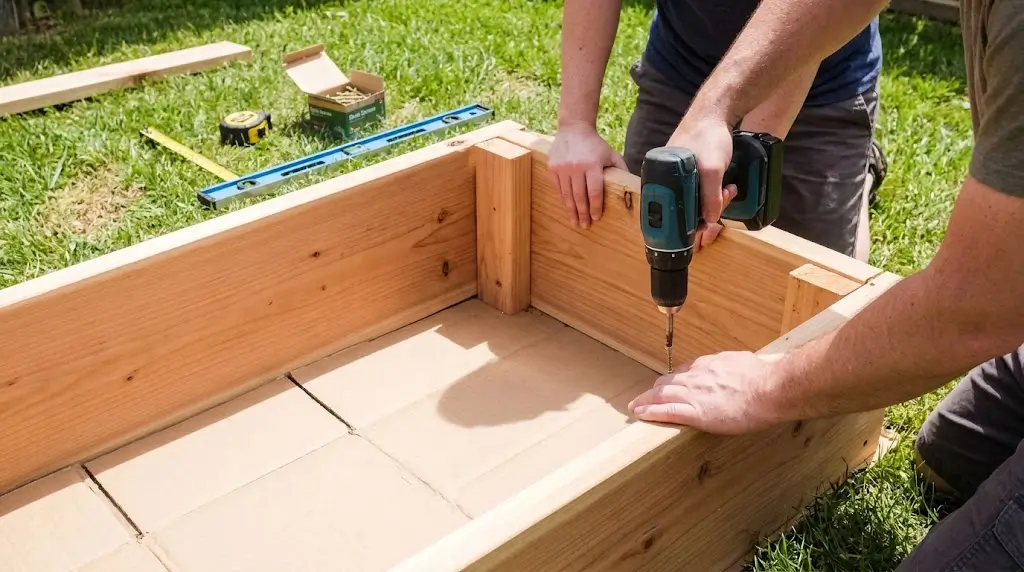
- Cordless Power Drill: Essential for driving deck screws into the wood without splitting the boards.
- Measuring Tape & Pencil: For accurate planning and cuts.
- Circular Saw or Hand Saw: If you are cutting your own lumber (note: most hardware stores will pre-cut boards for you upon request).
- Level: To ensure your frame sits perfectly flat on the ground, which prevents water from pooling at one end.
- Staple Gun: Useful if you decide to attach hardware cloth to the bottom to keep out burrowing pests like moles.
- Wheelbarrow and Shovel: For mixing and moving your heavy soil blend into the finished frame.
Project Time & Growth Timeline
Setting up your new garden is a satisfying weekend project that yields years of results.
- Active Setup Time: 3 to 5 hours. This includes clearing the ground, assembling the wooden frame, laying the weed barrier, and filling the box with your soil mixture.
- Ongoing Maintenance Time: Integrating a smart garden irrigation system reduces daily watering chores by up to 80%. Expect to spend just 10 to 15 minutes a week pruning, harvesting, and checking your smart app for soil nutrient alerts.
- Expected Growth Timeline: Because soil in raised structures warms up faster in the spring than ground soil, you can often plant 1 to 2 weeks earlier. Fast-growing crops like radishes and lettuce can be harvested in as little as 25 to 30 days after planting.
Step-by-Step Guide
1. Select and Prep the Perfect Location
Choose a flat, level spot in your yard that receives at least 6 to 8 hours of direct sunlight daily. Once you have chosen the spot, mow the grass underneath as short as possible. You do not need to dig up the sod; simply lay down your cardboard weed barrier directly over the cut grass.
2. Cut and Assemble the Frame
If you are building a standard 4×8 foot box, cut your lumber accordingly. Place your corner posts down and attach the side boards using your cordless drill and exterior-grade screws. Ensure you pre-drill the holes to prevent the cedar boards from splitting. Use your level to make sure the structure is perfectly horizontal.
3. Install Pest Protection and Weed Barriers
To stop moles and gophers from eating your root vegetables from below, staple a layer of galvanized hardware cloth to the bottom of your wooden frame. Next, lay overlapping sheets of cardboard inside the base of the bed. The cardboard will kill the grass underneath and eventually decompose, inviting beneficial earthworms into your garden.
4. Integrate Smart Tech and Irrigation
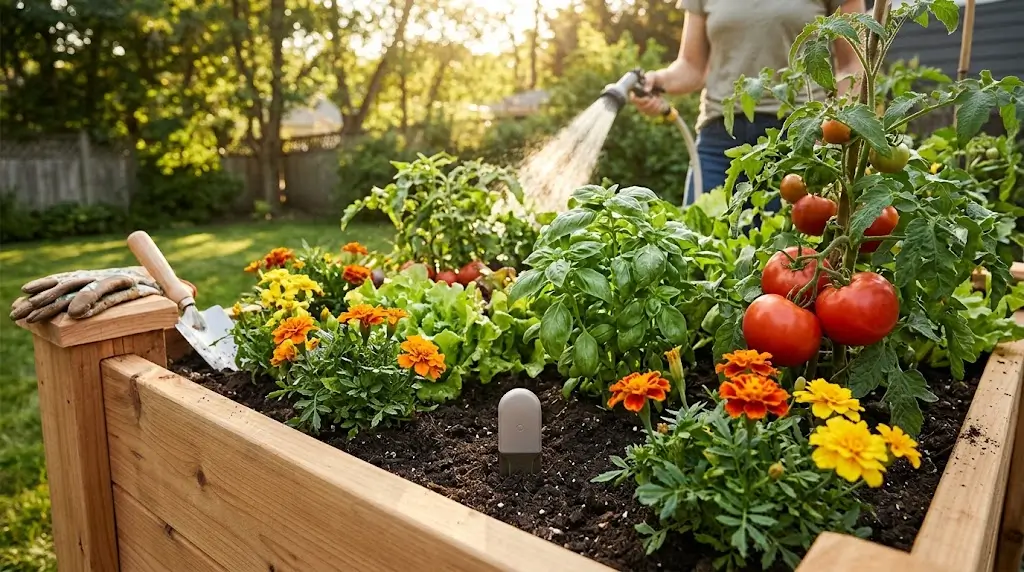
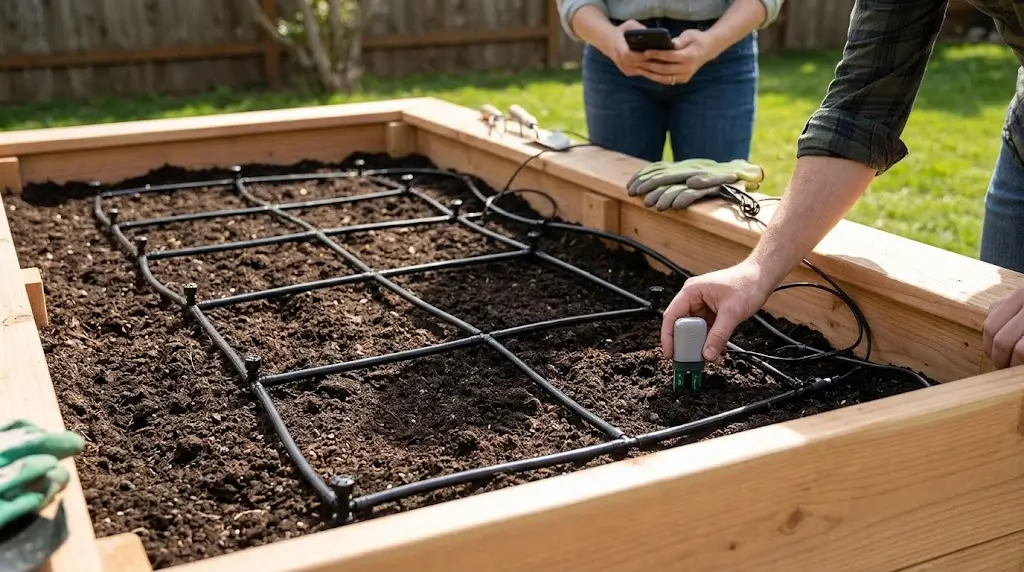
Before adding soil, lay out your drip irrigation tubing. Running a smart drip line along the surface ensures water goes directly to the plant roots, reducing evaporation. You can also place a Wi-Fi-enabled soil monitor in the center of the bed to track ambient temperature and moisture levels right on your smartphone. [Check out our guide on Automated Irrigation Systems for a deep dive into setup].
5. Fill with the Soil Mixture
Do not just use cheap dirt. Fill the bottom half of the bed with organic matter like twigs, dried leaves, and grass clippings (a modified Hugelkultur method) to save money on soil. Fill the top half with your high-quality mix of topsoil, compost, and perlite. Rake it smooth and water it thoroughly before planting your seeds or seedlings.
Plant Requirements & Technical Specs
To get the most out of your elevated setup, you must understand the environmental requirements of both your plants and your tech devices:
- Sunlight: Most fruiting vegetables (tomatoes, peppers, cucumbers) require full sun, meaning a minimum of 6 hours of direct, unobstructed light.
- Watering Needs: Elevated soil drains significantly faster than ground soil. In peak summer, you may need to water daily. A smart controller can automate this by adjusting schedules based on local weather forecasts.
- Soil pH: Aim for a slightly acidic to neutral pH between 6.0 and 7.0, which is ideal for the vast majority of garden crops.
- Device Connectivity: If using smart sensors or Wi-Fi timers, ensure your garden location is within range of your home’s 2.4GHz Wi-Fi router. If the signal is weak, consider installing an outdoor Wi-Fi extender.
Alternative Methods & Eco-Friendly Options
If traditional wood construction isn’t for you, there are several sustainable and adaptable alternative methods to consider:
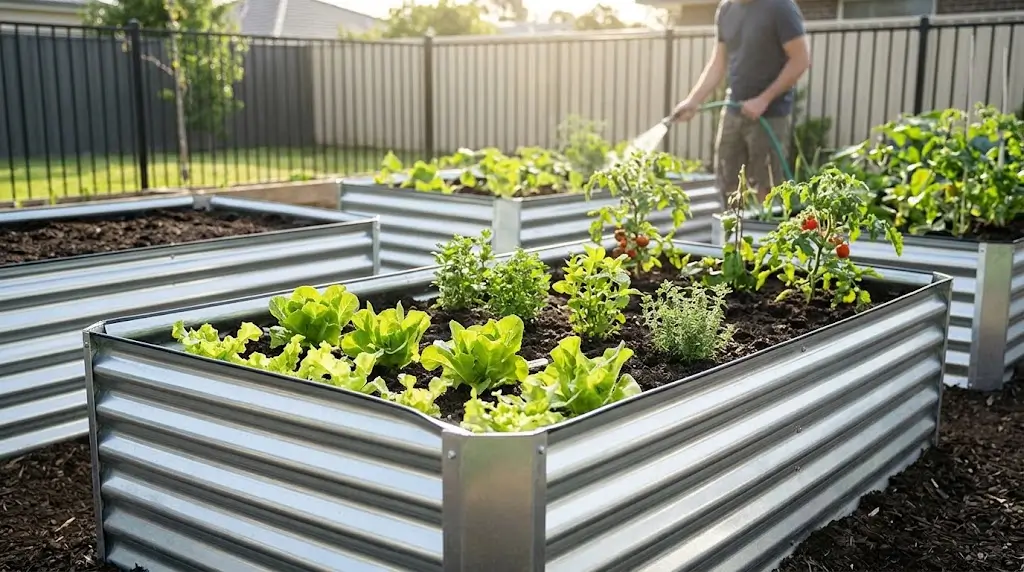
- Galvanized Steel Planters: Metal beds are incredibly durable, modern-looking, and naturally resistant to rot and pests. They warm up quickly in the spring, though they can get hot in extreme summer climates.
- The Hugelkultur Method: If you are building a very deep planter (over 2 feet tall), filling the entire thing with bagged soil is expensive. Hugelkultur involves filling the bottom 60% of the bed with rotting logs, branches, and compostable organic matter. This breaks down over time, feeding your plants and acting like a sponge to retain moisture.
- Fabric Grow Bags: For apartment dwellers or those with limited patio space, heavy-duty fabric grow bags act as miniature raised beds. They are budget-friendly, promote excellent root aeration, and can be folded away in the winter. [Read more in our Indoor Houseplants Care and balcony gardening guides].
Placement and Companion Planting Suggestions
Where you place your plants within the box is just as important as where you place the box in your yard.
- Sun Orientation: Align your bed from North to South. This ensures that as the sun moves from East to West, all plants receive equal light, and taller plants do not shade out shorter ones. Place tall vining crops (like peas or indeterminate tomatoes) on the North end of the planter.
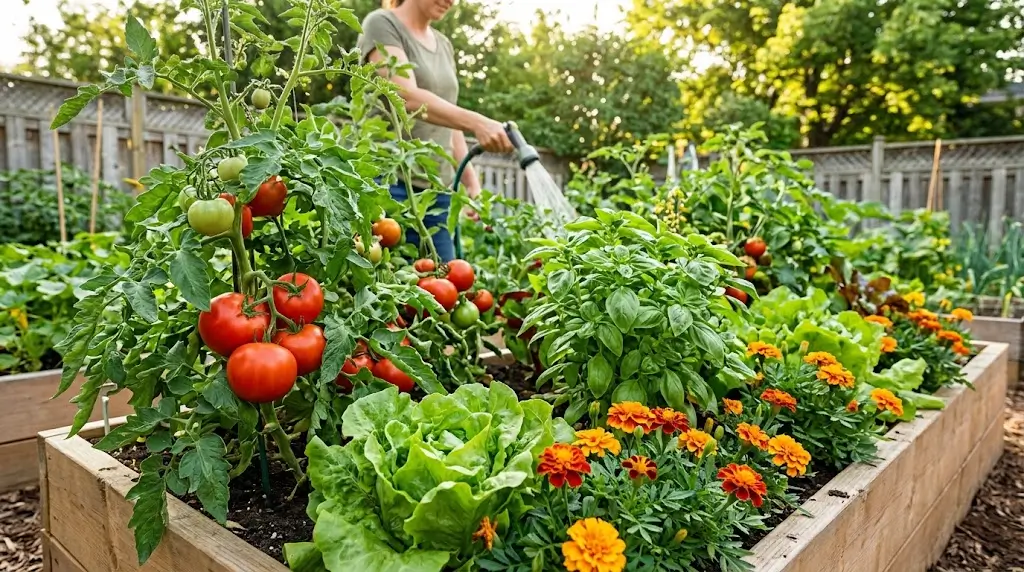
- Companion Planting: Maximize your space by planting symbiotic species together. Plant Basil next to Tomatoes; the basil helps repel pests and is rumored to improve the flavor of the tomatoes. Plant Marigolds around the perimeter to naturally deter harmful nematodes and attract essential pollinators.
Common Mistakes to Avoid
Even seasoned gardeners make errors when transitioning to elevated growing. Avoid these common pitfalls:
- Making the Bed Too Wide: Never build a structure wider than 4 feet. If it is wider, you will have to step into the dirt to reach the center, which compacts the soil and ruins the loose structure plant roots love.
- Using Pressure-Treated Wood: Older pressure-treated woods contain harmful chemicals (like CCA) that can leach into your edible crops. Always stick to naturally rot-resistant woods like cedar or use untreated pine if you are on a strict budget.
- Forgetting to Mulch: Because elevated soil dries out faster, leaving the top layer exposed to the sun is a mistake. Always add a 2-inch layer of organic straw or shredded leaves on top to retain moisture and regulate soil temperature.
Maintenance and Long-Term Care Tips
A well-built garden structure will last for a decade or more if properly maintained:
- Annual Soil Refresh: Organic matter breaks down over time, causing the soil level to drop. Every spring, top off your planter with 2 to 3 inches of fresh, nutrient-dense compost to revitalize the microbial life.
- Tech Maintenance: Before the first winter freeze, bring your smart soil sensors and battery-operated irrigation timers indoors to prevent the cold from destroying the internal electronics.
- Crop Rotation: Do not plant the same vegetable family in the exact same spot year after year. Rotating your crops (e.g., swapping where you plant nightshades and brassicas) prevents the depletion of specific soil nutrients and stops the life cycle of soil-borne diseases. [Learn more about managing your garden’s ecosystem in our Soil and Composting Basics guide].
Conclusion
Building a raised garden bed is the smartest investment you can make for your backyard horticulture journey. By utilizing quality materials, incorporating smart irrigation technology, and understanding proper soil dynamics, you can enjoy an abundance of fresh, organic vegetables with a fraction of the physical labor.
Ready to transform your backyard? Grab your tools, start building, and share photos of your completed garden setup in the comments below! Don’t forget to subscribe to our newsletter for more weekly Smart Gardening & Tech updates.
FAQs
How deep should a raised garden bed be?
For most vegetables like lettuce, radishes, and herbs, 8 to 12 inches of depth is perfectly sufficient. However, if you want to grow deep-rooted crops like carrots, potatoes, or large tomato varieties, aim for a depth of 18 to 24 inches to allow for optimal root expansion.
Does a raised garden bed need a bottom?
No, it does not need a solid bottom. In fact, leaving the bottom open to the native earth allows for better water drainage and lets beneficial earthworms migrate up into your specialized soil mix. You only need to line the bottom with hardware cloth if you have issues with burrowing rodents.
Do I need to replace the soil every year?
No, you do not need to replace all the dirt. However, because the plants consume the nutrients, you should amend the existing dirt every single spring by mixing in a few inches of fresh compost, worm castings, or slow-release organic fertilizer to keep the environment fertile.