Weed killer 7 Best Tips For A Weed-Free Yard
Did you know that invasive weeds can steal up to 30% of the essential water and soil nutrients meant for your prized lawn and garden plants? Whether you are cultivating a pristine putting-green lawn or managing a high-tech smart vegetable garden, weeds are the ultimate biological disruptors. Finding the right weed killer is absolutely critical to maintaining the health and aesthetics of your outdoor space. However, modern weed management has evolved far beyond indiscriminately spraying harsh chemicals. Today, integrating targeted botanical treatments, systemic herbicides, and smart-weather data ensures you can eradicate invasive species down to the root without harming your local ecosystem. In this comprehensive guide, we will break down the science of weed eradication, the best materials for the job, and how to use smart gardening technology to keep your yard permanently pristine.
Quick Answer:
A highly effective weed killer strategy relies on identifying the specific weed type (broadleaf vs. grassy) and applying a targeted systemic herbicide during optimal weather conditions. By utilizing pre-emergent barriers in the spring and integrating smart weather stations to time your post-emergent sprays, you can achieve a flawless, weed-free landscape with minimal effort.
Materials and Supplies List
Eradicating stubborn weeds requires a precise chemical or botanical toolkit. Using the wrong formula will either scorch your grass or leave the weed’s root system completely intact. Here is the ultimate materials list for professional-grade weed management:
- Selective Systemic Weed Killer: Look for a formula containing 2,4-D, Dicamba, or Quinclorac. These are designed to target broadleaf weeds (like dandelions and clover) while leaving your turfgrass completely unharmed.
- Non-Selective Weed Killer: For driveways, patios, and preparing new garden beds, a non-selective formula (like Glyphosate or high-concentration Glufosinate) will clear all vegetation it touches.
- Surfactant (Spreader-Sticker): A critical additive that breaks the surface tension of water, allowing the herbicide to coat and stick to the waxy leaves of weeds rather than beading up and rolling off into the soil.
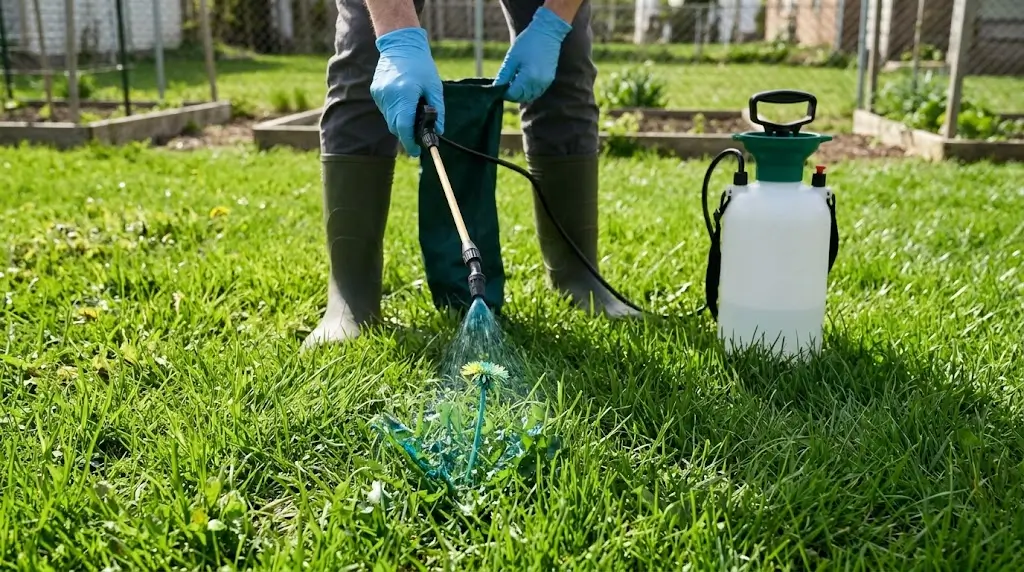
- Herbicide Dye Indicator: A temporary blue or green dye you mix into your sprayer. It marks exactly where you have sprayed, preventing chemical waste and dangerous over-application.
- Eco-Friendly Substitutions: If you prefer an organic approach, horticultural vinegar (20% acetic acid) mixed with a few drops of dish soap makes an excellent burn-down contact weed killer for patios. Alternatively, corn gluten meal acts as an excellent natural pre-emergent for lawns.
Tools and Equipment Required
Applying weed treatments safely and efficiently requires specialized gear. Do not use the same equipment for your herbicides that you use for your liquid fertilizers to avoid accidental cross-contamination.
- Pump Garden Sprayer: A 1-gallon or 2-gallon manual pump sprayer with an adjustable brass nozzle for precise spot-treating. For larger properties, a 4-gallon battery-powered backpack sprayer ensures consistent pressure.
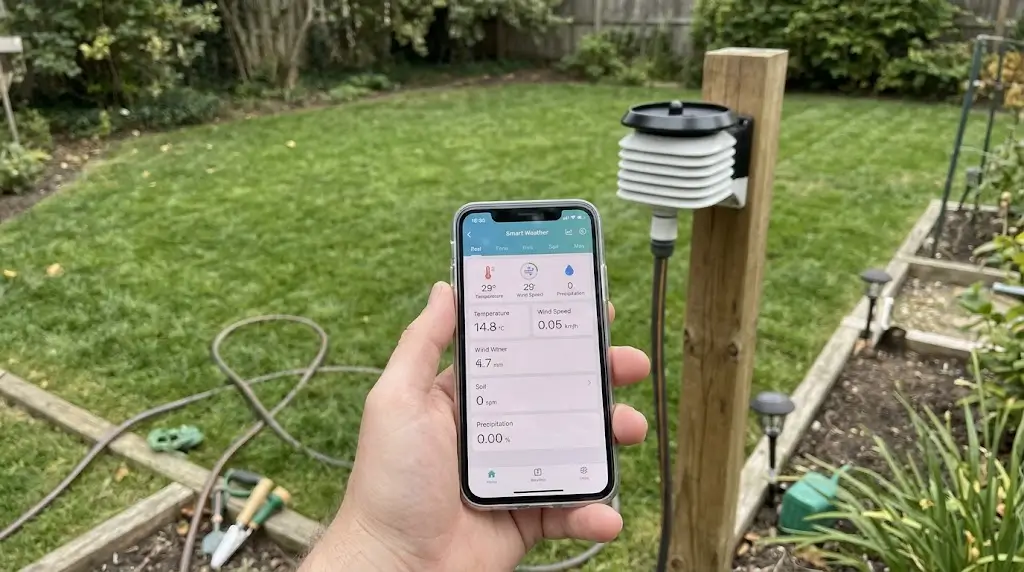
- Smart Weather Station: A Wi-Fi-enabled backyard weather station (like Ambient Weather or Tempest) to track real-time wind speed, soil temperature, and impending rain forecasts.
- Protective Gear (PPE): Safety is non-negotiable. Always wear unlined nitrile gloves, safety goggles, long pants, and closed-toe rubber boots to prevent dermal exposure to chemical treatments.
- Weeding Knife (Hori-Hori): A heavy-duty, serrated soil knife for manually slicing deep taproots out of the earth when spraying is not a viable option near sensitive smart garden sensors.
Project Time & Growth Timeline
Proper weed control is a game of patience and timing. Understanding the biological timeline of herbicides prevents you from prematurely applying more product and damaging your yard.
- Active Setup and Spray Time: 30 to 45 minutes. Mixing the solution and spot-treating a standard 5,000-square-foot lawn is a fast process if you use a marker dye to track your progress.
- Wilting and Die-Off Timeline: When using a systemic weed killer, you will notice the weeds curling and wilting within 24 to 48 hours. However, complete root death and browning usually take 10 to 14 days. Do not pull the weed until it is completely dead, or you risk leaving living root fragments behind.
- Expected Maintenance Timeline: Using a smart weather monitor reduces chemical waste and re-application time by up to 50%. Expect to do a quick 15-minute perimeter spot-check once a month during the active growing season.
Step-by-Step Guide
Step 1: Identify the Target Weeds and Turf
Before mixing any solutions, you must know what you are fighting. Broadleaf weeds (dandelions, plantain, chickweed) require different active ingredients than grassy weeds (crabgrass, nutsedge). Use a smart plant identification app on your phone to scan the weed. Verify that your chosen selective weed killer is safe for your specific turfgrass type (Bermuda, Fescue, Kentucky Bluegrass), as some formulas can scorch sensitive grasses.
Step 2: Consult Your Smart Weather Data
Timing is everything. Check your smart weather station app. You need a 24-hour window with no rain (to prevent the chemical from washing away) and wind speeds consistently below 5 mph to completely prevent chemical drift onto your garden beds. The ambient temperature should be between 65°F and 85°F; if it is too hot, the weeds close their stomata and will not absorb the chemical.
Step 3: Mix the Solution with Precision
Put on your safety gear. In your dedicated herbicide sprayer, mix the weed killer concentrate with water according to the exact manufacturer label rates. Add 1 ounce of non-ionic surfactant per gallon of water to ensure the mixture clings to the leaves, and add 1/2 ounce of blue marker dye so you can track your application footprint visually.
Step 4: Execute Targeted Spot Spraying
Pressurize your sprayer and adjust the nozzle to a coarse spray setting (fine mists drift easily). Walk your lawn methodically, giving a quick, one-second burst to the center rosette of each weed. You only need to lightly wet the foliage; you do not need to drench the weed until the liquid runs off into the soil. The blue dye will show you exactly which weeds have been treated.
Step 5: Post-Application Care and Monitoring
Keep pets, children, and smart robotic lawnmowers off the treated grass until the application is completely dry (usually 2 to 4 hours). Do not mow the lawn or run your smart irrigation system for at least 48 hours to give the systemic chemical time to travel from the leaves down into the deepest taproots.
Plant Requirements & Technical Specs
Understanding the environmental parameters required for chemical efficacy will dramatically increase your success rate and protect your surrounding ecosystem:
- Soil Temperature and Pre-Emergents: Pre-emergent weed killers (which stop seeds from germinating) must be applied when the soil temperature reaches exactly 55°F for 3 consecutive days. Use a smart soil thermometer to track this metric in early spring.
- Rain-fastness: Most modern synthetic herbicides are “rain-fast” within 1 to 2 hours. However, organic horticultural vinegars can be washed away easily and require at least 12 hours of dry weather to burn the plant tissue effectively.
- Soil pH Interactions: Weeds like dandelions thrive in acidic, compacted soil (pH below 6.0). By regularly testing your soil and adding lime to raise the pH to a neutral 6.5 or 7.0, you naturally create an environment where premium turfgrass outcompetes the weeds.
Alternative Methods & Eco-Friendly Options
If you are maintaining a purely organic landscape or managing weeds near edible vegetable beds, traditional chemical herbicides are not an option. Here are the best sustainable alternatives:
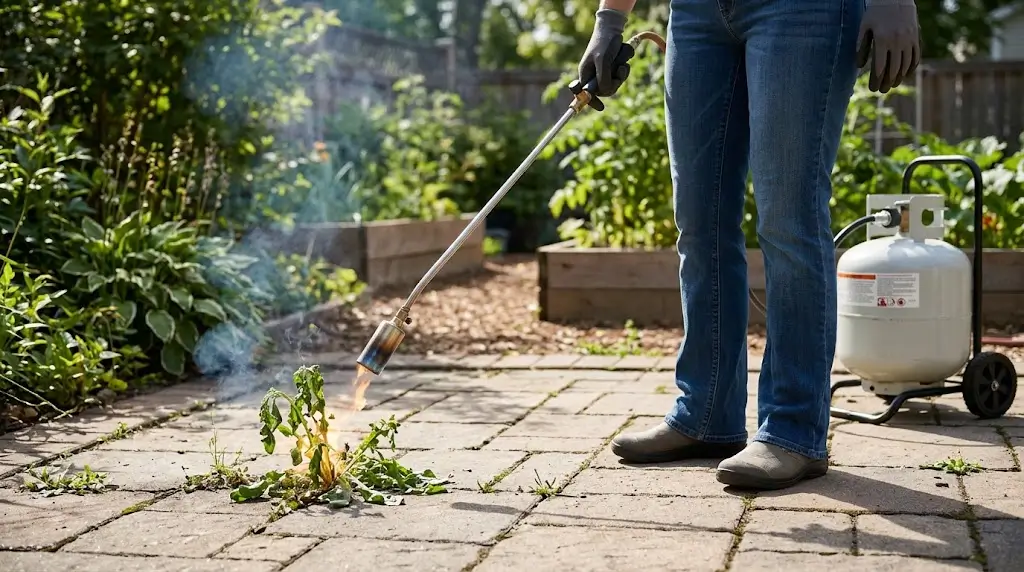
- Thermal Weeding (Flame Weeders): For brick patios and gravel driveways, a propane flame weeder is incredibly effective. You do not need to burn the weed to ash; simply passing the intense heat over the leaves for a split second boils the water inside the plant cells, causing the weed to instantly collapse and die without any chemical residue.
- Boiling Water: The cheapest and safest non-selective weed killer is water straight from your kettle. Pouring boiling water directly onto pavement weeds instantly kills the foliage and cooks the root system.
- Solarization: If an entire garden bed is overrun, lay down a sheet of heavy-duty clear UV plastic over the soil in mid-summer. Pin it down tightly. The greenhouse effect will bake the top few inches of soil, killing all weed seeds and pathogens organically over 4 to 6 weeks.
Placement and Companion Planting Suggestions
The best weed killer is often not a spray at all—it is strategic landscaping and dense planting that naturally suppresses unwanted growth.
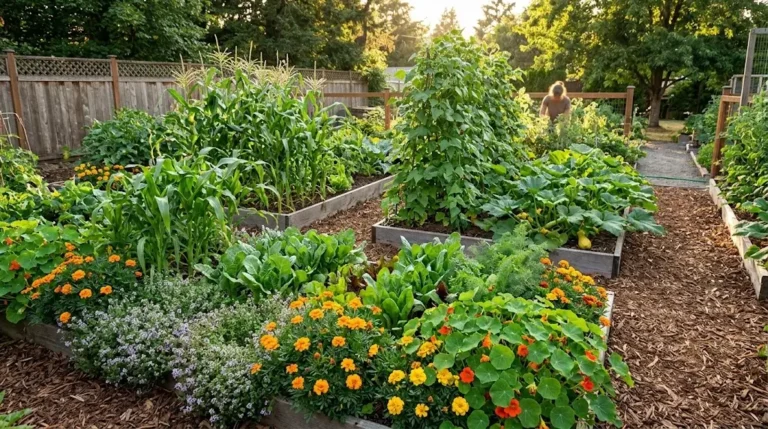
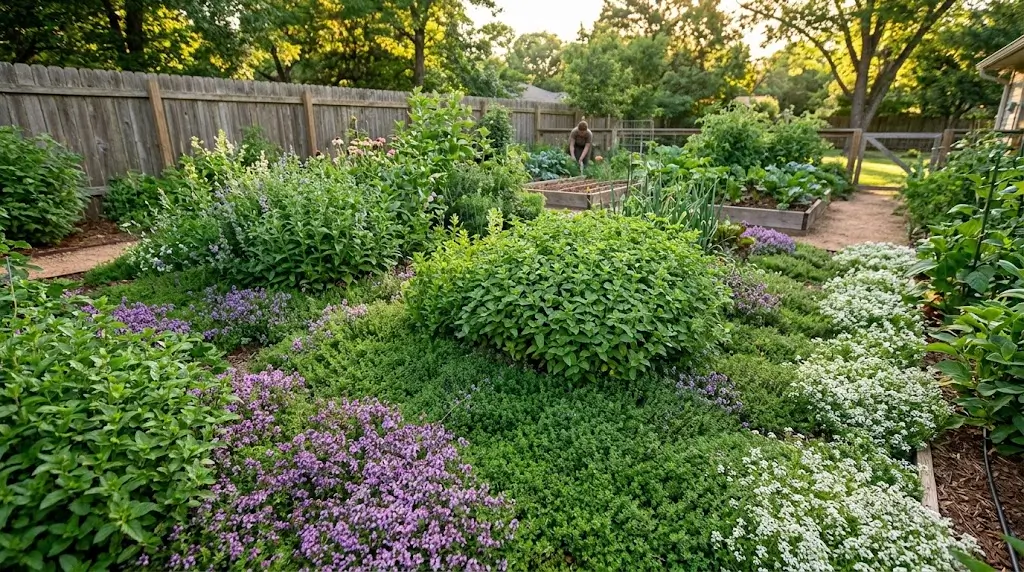
- Dense Companion Ground Covers: Nature hates a vacuum. If you have bare soil, weeds will fill it. Plant dense, low-growing companion plants like Creeping Thyme, Sweet Alyssum, or Corsican Mint around your taller feature plants. These act as a “living mulch,” shading the soil so weed seeds never get the sunlight they need to germinate.
- Mulch and Smart Tech Spacing: Apply a thick, 3-inch layer of organic cedar mulch to all garden beds. When placing smart soil moisture sensors or automated drip irrigation lines, route them underneath the mulch layer. This keeps the tech hidden from UV damage while the deep mulch entirely smothers airborne weed seeds.
Common Mistakes to Avoid
Even experienced gardeners can make costly errors when trying to eradicate persistent yard invaders. Avoid these common pitfalls to protect your landscape:
- Using Non-Selective Sprays on Lawns: Grabbing a bottle of Glyphosate (Roundup) to kill a dandelion in your grass is a massive mistake. It will kill the weed, but it will also kill a one-foot circle of your premium turfgrass, leaving a bare dirt patch that invites even more weeds to grow. Always check that the label says “Lawn Safe” or “Selective.”
- Spraying Stressed Weeds: Do not apply weed killer during a severe summer drought. When weeds are drought-stressed, they go dormant and stop circulating fluids. If you spray them, the chemical will just sit on the leaf and burn it, but it will never travel down to kill the roots. Water your lawn thoroughly two days before spraying to ensure the weeds are actively growing.
- Over-Diluting the Mixture: Adding extra water to the tank to “stretch” the chemical does not save money; it creates a sub-lethal dose. The weed will get sick, recover, and potentially develop an immunity to that specific herbicide action mode. Always mix exactly to the label’s specifications.
Maintenance and Long-Term Care Tips
A successful weed management strategy relies on consistent, year-round maintenance to prevent future outbreaks before they start.
- Clean Your Equipment Promptly: Never leave mixed weed killer sitting in your pump sprayer over the winter. The chemicals will degrade the rubber gaskets, causing dangerous leaks. Triple-rinse your sprayer tank, wand, and nozzles with clean water immediately after every use.
- Establish a Pre-Emergent Schedule: The easiest weed to kill is the one that never grows. Apply a granular pre-emergent herbicide in the early spring to stop crabgrass, and again in the early fall to prevent winter weeds like poa annua and henbit.
- Overseed Your Lawn: The ultimate long-term weed killer is a thick, healthy lawn. Core aerate and overseed your turf every autumn. Dense grass roots will choke out weed seeds, naturally reducing your reliance on chemical sprays year after year.
Conclusion
Mastering the use of a weed killer involves much more than simply spraying chemicals. By identifying your exact weed type, utilizing smart weather data for perfect timing, and embracing dense companion planting, you can create a permanently lush, pristine landscape.
Ready to take back control of your yard? Try mapping out your spring pre-emergent strategy today, share your favorite eco-friendly weeding hacks in the comments below, and subscribe for more Smart Gardening & Tech updates!
FAQs
Is it safe to let my dog or cat into the yard after using weed killer?
Safety should always come first. The general rule for most liquid residential herbicides is that the area is safe for children and pets only after the spray has completely dried. Depending on humidity and sunlight, this usually takes 2 to 4 hours. However, you must always read the specific product label, as some stronger agricultural formulas require keeping pets off the grass for a full 24 to 48 hours.
If it rains a few hours after I spray, do I need to reapply the weed killer?
This depends on the “rain-fast” rating of your specific product. Many modern synthetic systemic herbicides are rain-fast within 1 to 2 hours of application. If it rains after that window, the chemical has already penetrated the leaf cuticle, and you do not need to reapply. If it downpours 20 minutes after you spray, the product has likely washed away, but you should still wait 7 to 10 days to observe any wilting before deciding to spray again to avoid toxic chemical buildup in your soil.
Can I use a robotic lawnmower on the same day I apply herbicides?
It is highly recommended to pause your smart robotic mower’s schedule for at least 48 hours after applying a systemic weed killer. Mowing immediately after spraying chops off the foliage that just absorbed the chemical, preventing the herbicide from traveling down into the root system. Furthermore, the wet chemical can stick to the robotic mower’s tires and blades, unintentionally tracking the herbicide into sensitive garden beds.